Aurora is on version 2.5.0 C#, available at the Aurora Forums.
Contact Erik on the forum for a wiki account.
Galactic Map
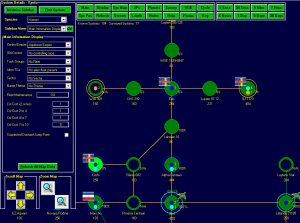
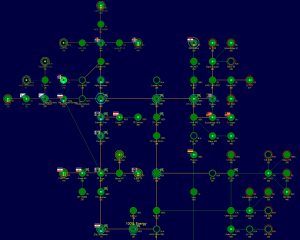
The Galactic Map interface provides a visual overview of the known galaxy, you can view all explored star systems and the jump points network that connects them, fleets dispositions, colonization prospects, allegiance, economy etc.
The Galaxy Map may be accessed from the main menu or by pressing F11 key. The sidebar displays information about the currently selected system (Star Type, Allegiance, Economy, Etc.) ... You can gain more specific info by accessing System Map.
You have manually arrange system positions on the galactic Map. See Organizing below.
(Find systems, Filter etc..)
Map Functions
You can Pan the map using either the Keypad numbers can be used to move the map in eight directions. The Keypad plus and minus can be used to zoom in and out.
You can zoom in\out using either the +\- key on the your keyboard's keypad or the zoom icons near the top left.
Each time you press Zoom the scale will double (you can check the current scale in the top left of the viewable area)
Organizing
Whenever a new system is discovered (by exploring a jump point), it shows up in the center of the galactic map. You can move the systems around to create a more sensible chart of your empire.
To move a single system, just hold shift and drag the system using the mouse. To move multiple systems, firstly use Ctrl-Click to select several systems or drag a box around them, then hold shift and drag one of the selected systems. Other selected systems will also be moved by the same amount. To deselect one of the selected systems use Ctrl-click again. To quickly deselect all selected systems, drag the mouse in a clear area
Note that this is only a temporary arrangement, to allows experimentation without commitment. In order to make the arrangement permanent, you need to click the "Sys Pos" button to open the "System Positions" dialogue box, and then hit the "Save Positions" button. There is also a "snap-to-grid" function that can be accessed by hitting the "Line Up" button in the same box. If you have been moving the systems around and you decide you don't like what you've done, you can hit the "Restore" button (before hitting Save Positions), which restores things to the last saved configuration.
Quick View Buttons
The Quick View Galactic Map Buttons are functionally similar to the tabs in the Main System Map Side-bar. They can be toggled on and off by using the QV key in the Side Bar
Main
The Main button changes the side bar to its main display setting.
Display
The Display button changes the side bar display to show the main Galactic Map display options.
Sys Map
The Sys Map Button brings the Main System Map to the foreground without closing the Galactic map.
JPs
The JPs button changes the sidebar to display a jump point view of the selected system.
Time Advance
- The Time Advance buttons allow the user to advance time from the Galactic map in the same way as those on the Main System Map or any of the other screens that feature Time advance buttons.
Sidebar
|
|
This section requires expansion Please contribute if you can! |
Main
Display
Show Time to System at Speed Bellow -
Main Screen Display
| Main Screen Display |
|---|

|
The yellow count of known systems and surveyed systems refers to gravitational surveys.
Many of the options listed below may be toggled on/off via the display options
System Links
The lines that connect pairs of discovered systems.
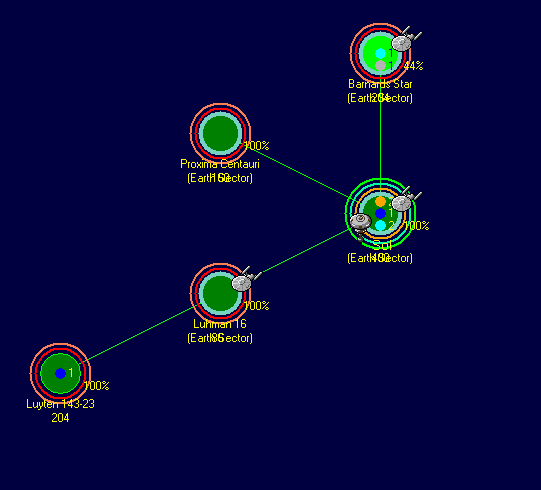
- Green: Both systems have a jump point that has been discovered to connect to the other.
- Orange: There is a jump gate on both sides of the system link, meaning any ship may pass between them without the need for a jump drive.
System Circles
Each System Circle will have a base color of green.
- The "selected" system is denoted by a brighter green.
- A system without the green center indicates a system with no major bodies.
- An optional ring that impinges on the system circle may indicate which Sector Command governs the system
Planetary Dots
The various (small) colored dots vertically aligned along each system's center point show the number of bodies with the various ranges of habitability.
- Blue: Planets with colony cost less than 2.0
- Cyan Planets with colony cost 2.0 to 2.99
- Grey: Colony Cost 3 to 4.99
Inner Rings
- Red - Incomplete Jump Point Survey
- Orange - JP Survey Complete but Unexplored Jump Points
Outer Rings
- Coral - Controlled but Unpopulated Systems
- Green - System with populated Colonies
- Bright Green - System with Colonies over 100 Million
Yellow Text
- The Yellow Percentage to the bottom right of each system displays the percentage of system bodies that have been orbitally Geo-surveyed.
- The Yellow Number below the Star designator is the number of Survey Points required to survey grav survey points in that system (Needs Verification)
- The Sector to which a system belongs may optionally appear in yellow below the Star Name
- The Star Type may optionally be shown
- The date your empire first began exploring the system optionally appears above the System Icon
- Travel Distance between a selected system and other systems may optionally be displayed as well as Travel Time
Ships
- A small icon of your selected ship type will appear in the upper right of each system icon when least one empire ship is present.
- A small icon of a space station will appear in the lower left of each system icon when least one shipyard exists in the system.


