Aurora is on version 2.5.0 C#, available at the Aurora Forums.
Contact Erik on the forum for a wiki account.
System Map
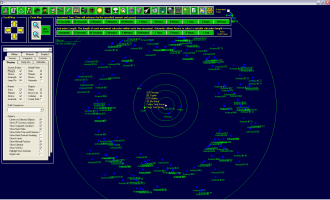
Most of the game will be played on the System Map F3 interface. This is a complete reference of all options available in this screen . For a Tutorial Explanation of the System Map, see Basics of the System Map. See also Galactic Map.
Tip: to measure distances shift & left-click, then drag the cursor in the system map.
Map
Dominating the screen is the Map. It affords a view of the system stars, planets, moons, ships, etc. Every blue dot on this screen is what's known in Aurora as a "Body". Every asteroid, moon, comet, planet and Asteroid Belt Object is a Body. Bodies orbit either another Body or a Star and ships can park at Bodies. Every colony (or 'population') in Aurora is associated with a body.
When you first access this screen, you likely be staring at a blue field with a bunch of confusing blue and green mishmash in the middle. Use the scroll & zoom controls to zoom in and focus on specific parts. The current scale of the map, and the amount of time it takes to traverse that distance (at 5000 km/s) is displayed in the upper left corner below the Sub-pulse Length bar.
Click an object on the star map to see more detailed information about that object in the Sidepanel.
Top Bar
At the top of the screen you will see an array of icons. Each is associated with an important screen of some kind. Bellow are the map scroll & zoom, and time control.
Button Menu Bar
| Icon | Tooltip | Screen Name | Main Menu Option | Shortcut |
|---|---|---|---|---|
| Colony Summary | Population and Production (Summary) | Empires -> Economics | F2 | |
| Industrial Production | Population and Production (Industry) | N/A | N/A | |
| Research | Population and Production (Research) | N/A | N/A | |
| Wealth | Population and Production (Wealth / Trade) | N/A | N/A | |
| Ground Forces | Population and Production (Ground Units) | N/A | N/A | |
| Officer Corps | Leaders | Empires -> Commanders | F4 | |
| Class Design | Class Design (Full Summary View) | Empires -> Class Design | F5 | |
| Ships | Individual Unit Details (Ship Design Display) | Empires -> Ships | F6 | |
| Fleet Orders | Task Groups (Task Group Orders) | Empires -> Task Groups | F12 | |
| Task Forces | Task Force Organization | Empires -> Task Force Organization | Ctrl+F4 | |
| Fighters | Fighter Squadrons (Details) | Empires -> Fighter Squadrons | F7 | |
| Combat Overview | Combat Assignments Overview (Setup Fire Controls) | Battle Control Window | F8 | |
| System View | System Generation and Display | Empires -> System Information | F9 | |
| Galactic Map | Galactic Map | Empires -> Galactic Map | F11 | |
| Diplomacy | Intelligence and Foreign Relations (Political Relations) | Empires -> Intelligence/Diplomacy | Ctrl+F5 | |
| Create Research Project | Create Research Project | Empires -> Create Research Project | Ctrl+F6 | |
| Potential Colonies | Available Colony Analysis | Empires -> Systems -> Available Colony Sites | Ctrl+A | |
| Fuel Situation | Fuel Report | Empires -> Fuel Situation | Ctrl+F12 | |
| Ships Requiring Repair | Damaged Ships | Empires -> Ships Requiring Repair | Ctrl+F11 | |
| Planetary Market | Not in V5.52 | N/A | N/A | |
| View Technology | Technology Report | Empires -> Technology Report | Ctrl+F7 | |
| Geological Survey Report | Geological Survey Report | N/A | N/A | |
| Shipping Line Information | Shipping Lines | Empires -> Shipping Lines | Ctrl+L | |
| Sectors | Assign Systems to Sectors | Empires -> Systems -> Sectors | N/A | |
| Refresh | System Map (refreshes the screen with any updates) | N/A | N/A | |
| Events | Event Log | Spacemaster -> Event Updates | Ctrl+F3 | |
| Intelligence On Alien Classes | Intelligence and Foreign Relations (Political Relations) | Empires -> Intelligence/Diplomacy | Ctrl+F5 |
Notes:
- Shortcut keys only work from the main menu
Scroll & Zoom Map
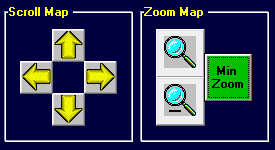
- Scroll: The arrows are used to move the System Map in the direction of the arrow. The numpad arrow keys can also be used to do this.
- Zoom: Click the Magnifying Glass icons to zoom in and out. As you zoom in, you will notice there are extra levels of detail. Min Zoom will zoom out so that the entire system can be seen.
Time Control
- See also: Time, Turns and Interrupts
- Automated Turns: Toggles whether or not only a player event will interrupt the time increment. Setting this option on means that Non-Player Race (NPR) events that do not affect the player will not cause the time increment to be interrupted. Recommended Setting: Checked.
- Increment Time: Click one of the time increment icons to advance time by the specified amount, and then pause the game. It is possible for an event to interrupt the specified time increment. If Automated Turns are on, then only player events can cause interrupts.
- Sub-pulse Length: The length of each movement sub-pulse within each time increment. Automatic allows the game to select a suitable sub-pulse length. Events detected during a sub-pulse can terminate the time increment early. Warning: Setting this to anything other than automatic can be performance intensive (IOW, setting a 5 second sub-pulse and using a 30 day time increment will take a LONG time for the time increment to run).
Sidepanel
The Sidepanel nine tabs, offers more detailed information about that the currently selected object, and options to control various aspects of the System Map.
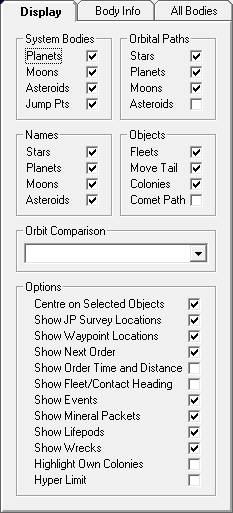
Display Tab
This tab is used to control various aspects of the System Map.
- System Bodies
- Toggles whether or not the associated type of system body is displayed.
- Options:
- Planets
- Moons
- Asteroids
- Jump Pts
- Orbital Paths
- Toggles whether or not the associated system body orbits are displayed.
- Options
- Stars (only applicable for non-primary stars in multi-star systems)
- Planets
- Moons
- Asteroids
- Names
- Toggles whether or not the associated system body's name is displayed.
- Options
- Stars (the primary star name is always shown)
- Planets
- Moons
- Asteroids
- Objects
- Toggles whether or not the associated objects are displayed.
- Options
- Fleets
- Move Tail (show a line from each fleet icon to its last known position. Allows you to see the direction the fleet is moving)
- Colonies (marks all system bodies that contain a colony with a circle around them.)
- Comet Path (lines will be drawn from the Sun through each comet and out to the maximum distance to which the comet will travel)
- Orbit Comparison
- This will draw (in light blue) the orbit of the chosen planet around the currently selected object. Useful in non-Sol system to provide an idea of scale.
- Choices are None, Mercury, Venus, Earth, Mars, Jupiter, Saturn, Uranus, Neptune, Pluto, 2x Pluto, 5x Pluto and 10x Pluto.
- Options
- Centre on Selected objects: Toggles whether or not the System Map will centre on an object when it's clicked.
- Show JP Survey Locations: Toggles whether or not the 30 jump point survey locations (white dots) are shown.
- Show Waypoint Locations: Toggles whether or not the Waypoints created in the Waypoints tab are shown.
- Show Next Order: Toggles whether or not a Task Groups's next orders are shown next to it's name.
- Show Order Time and Distance: Toggles whether or not a Task Group's distance to target and estimated time to arrival is shown next to it's name
- This information is only shown if "Show Next Order" is toggled on.
- Show Fleet/Contact Headings: Toggle whether or not a Task Group's or Contact's travel heading are shown next to it's name.
- Show Events: Toggles whether or not an empire's events are displayed at the bottom of the System Map screen. This will only list events that are considered interrupt events (e.g. Minerals Located is not an interrupt event, so will not be shown).
- Explanation from Steve Walmsley: The minerals located event is not an interrupt event so the game keeps running sub-pulses after it has been reported. The Events window lists all events, whereas the system map event list only reports current events. So the system map isn't showing the mineral located event because it isn't actually a current event.
- Show Mineral Packets: Toggles whether or not the mineral packets thrown by mass drivers are shown.
- Show Lifepods: Toggle whether or not Lifepods from destroyed ships are shown.
- Show Wrecks: Toggle whether or not destroyed ships are shown.
- Highlight Own Colonies: Toggles whether or not a light blue circle is drawn around any of your colonies containing population.
- Hyper Limit: Toggles whether or not the area in which hyperdrive will not work is shown. This is a light blue shaded area.
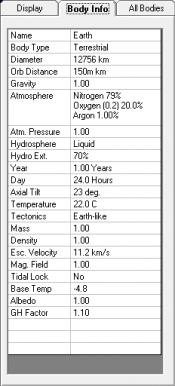
Body Info Tab
- This tab displays basic stellar information about the currently selected system body.
All Bodies Tab
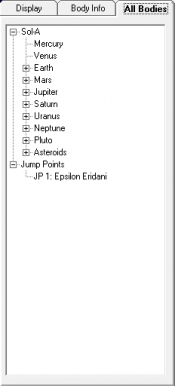
- This tab displays a tree view of all the system bodies (stars, planets, moons, and asteroids) except for comets, as well as known Jump Points. Clicking on a name will select that object, as well as centre the System Map on the object.
- NOTE 1: While it appears that you can change a name in this tab, any name change won't take effect, and disappears if you refresh the map.
- NOTE 2: If you click on a name in the list, then using the + and - keys on the numpad will open and close a tree branch on this tab, instead of zooming on the main map.
Sensors Tab
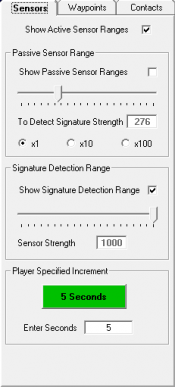
This tab is used to toggle whether or not sensor ranges are displayed on the System Map, and allows you to configure how you view details of your sensor capabilities.
- Show Active Sensor Ranges
- Toggles whether or not any active sensors in use are displayed. Ships with active sensors that do not have their sensors switched on will not have their sensors shown. Sensors are shown as a light blue circle around the selected fleet, along with the name of the active sensor at the top of the circle.
- Passive Sensor Range
- Show Passive Sensor Ranges: Toggles whether or not to show passive sensor ranges
- To Detect Signature Strength: The slider used in conjunction with the x1, x10 or x100 radial buttons will determine the signature strength to be used, and is displayed in this box.
- Signature Detection Range
- Show Signature Detection Range: Toggles whether or not to show the range at which a fleet will be detected with the specified Sensor Strength. Sensor ranges are shown as a red circle.
- Sensor Strength: The slider is used to set the Sensor Strength, and will show in the box.
- Player Specified Increment
- Enter Seconds: Enter the amount of seconds to be used to increment time in the game. This is useful if none of the pre-configured time increments match what you want.
- Disabling Sensors System-wide
- SM option to disable all sensors in this system. Once activated, there will be no detection phase for ships and planets in that system until it is turned back on again.
- Useful for a multi-system Earth start, where the number of detection checks grows exponentially as you add extra races. If you happen to be playing a game in which you want to start multiple races on Earth but there will be a period without the likelihood of combat, you may want to disable sensor checks in Sol for a while for performance reasons.
Waypoints Tab
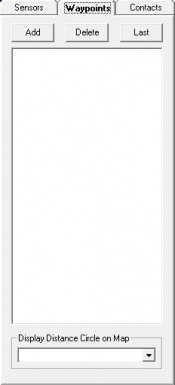
- This tab is used to add and delete user-defined waypoints on the System Map. Useful for setting up destinations for ship movement and missile launches. Clicking the Last button will place a waypoint on the last system body you selected and that waypoint will move with it.
- Display Distance Circle on Map
- Used to draw a light blue circle around any object on the System Map. Very useful for determining ranges.
- Valid ranges are (in kilometers): None, 100k, 200k, 300k, 500k, 750k, 1m, 1.5m, 2m, 3m, 5m, 10m, 25m
Contacts Tab
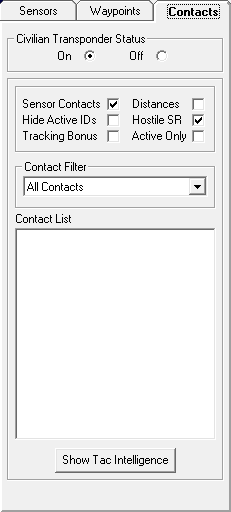
This tab allows you to modify how contacts are displayed.
- Civilian Transponder Status
- Toggles whether civilian ships keep their transponders on or off.
- Other Options
- Sensor Contacts: Toggles whether or not to show contacts found by the viewing race in the system.
- Hide Active IDs: Toggles whether or not to hide IDs on the System Map so that similar active contacts will be grouped together.
- Tracking Bonus: Toggles whether or not to show any tracking bonus gained through observing contacts over time. This bonus is used to reduce tracking speed penalties.
- Distances: Toggles whether or not to show the distance from all contacts to the currently selected object.
- Hostile SR: Toggles whether or not to show the estimated Sensor Range of detected hostile active sensors.
- Active Only: Toggles whether or not only contacts detected by active sensors will be displayed. Useful for determining which Contacts are able to be fired upon with missiles.
- Contact Filter
- Allows the player to choose which contacts are shown in the Contact List.
- Options are:
- All Contacts
- No Civilian
- No Civilian/Allied
- Neutral or Hostile
- Hostile Only
- Contact List
- The list of contacts in the system, filtered by the Contact Filter.
- Show Tac Intelligence button
- Brings up the Intelligence and Foreign Relations screen (Tactical Intelligence tab) for the selected Contact.
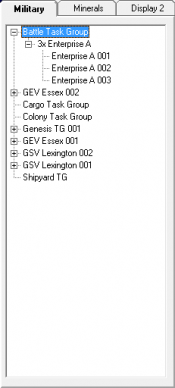
Military Tab
- This tab shows all of the task groups in the system in a tree view:
- Task Group
- Class
- Individual Ship
- Class
- Task Group
- Click a Task Group to bring up the Task Groups screen for the selected Task Group.
- Click a Class to bring up the Class Design screen for the selected Class.
- Click an individual ship to bring up the Individual Unit Details screen for the selected ship.
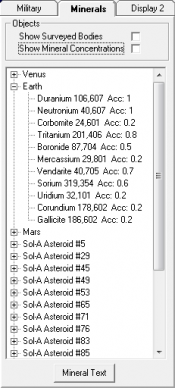
Minerals Tab
This tab shows a list of all system bodies that have mineral deposits, along with their minerals, the concentration, and the accessibility. Clicking on a system body name or mineral will centre the System Map on the body.
- Objects
- Show Surveyed Bodies: Toggles whether or not a white circle is shown on the System Map around system bodies that have already been surveyed.
- Show Mineral Concentrations: Toggles whether or not a green circle is shown on the System Map around system bodies that have already been surveyed and have mineral deposits.
- If both options are checked, then both circles will be displayed, with the green circle outside the white circle.
- Mineral Text button
- Changes the list view to a textbox view with a mineral report (for cut and paste purposes). The textbox view also displays the number of planets, moons and asteroids in the system. Click this button again to return to list view.
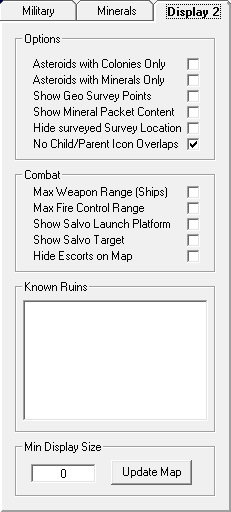
Display 2 Tab
This tab contains additional display options, allowing the player to further refine what is shown on the System Map.
- Options
- Asteroids with Colonies Only: If asteroids are selected to be viewed, then this toggles whether or not only asteroids with colonies are shown.
- Asteroids with Minerals Only: If asteroids are selected to be viewed, then this toggles whether or not only asteroids with surveyed mineral deposits are shown.
- The above two options are mutually exclusive
- Show Geo Survey Points: Toggles whether or not the amount of points required to geologically survey the system body are shown next to the system body name.
- Show Mineral Packet Content: Toggles whether or not the contents of any mineral packets in flight (from using Mass Drivers) are shown.
- Hide Surveyed Survey Location: Toggles whether or not only the Jump Point Survey Locations which have yet to be surveyed are shown.
- No Child/Parent Icon Overlaps: Toggles whether or not various Show options are overriden if a system body's icon wholly or partially obscures the icon of its parent star or planet.
- Combat
- Max Weapon Range (Ships): Toggles whether or not to show the maximum range at which weapons will score at least 1 point of damage, using the weapon ranges. Circle shown in light blue.
- Max Fire control Range: Toggles whether or not to show the maximum range at which weapons will score at least 1 point of damage, using the fire control ranges. Circle shown in dark blue.
- Show Salvo Launch Platform: Toggles whether or not to show the origin of all missile salvos.
- Show Salvo Target: Toggles whether or not to show the target of all missile salvos.
- Hide Escorts on Map: Toggles whether or not to show fleets that have a Protect Threat Axis order set. This is to prevent cluttering the map when zoomed out.
- Known Ruins
- Lists any ruins discovered in the system, as well as any known, unexploited ruins anywhere.
- Min Display Size
- Minimum diameter required for a system body to be displayed on the map. Click the Update Map button after entering a number to update the System Map.
Main Map Display Icons
Hopefully most of the main map display icons are self explanatory or intuitively obvious but here is a list that may include some that are not
Astronomical Bodies
- A solid light pink circle indicates a star
- A solid blue circle is used for any non-star astronomical body
- A white circle around that solid blue circle optionally indicates that a colony has been established on that body.
- A single green circle around that solid blue circle will optionally indicate if any minerals were found.
- A green circle surrounding a white circle surrounding a solid blue circle indicates a colony on that body
- There is no additional graphical indicator that a body has had a ground based survey as well.
- A hollow white circle optionally indicates an unexplored gravitational survey point
- A solid white circle optionally indicates an explored gravitational survey point
Vessels
- A small green circle indicates a ship controlled by your empire
- A small orange circle indicates a jump point. The label will indicate if it's unexplored or to which system it leads
- A small yellow circle indicates a minerals packet en route via a mass driver.
- A small blue circle indicates a commercial vessel
- A small red circle indicates a hostile vessel
additionally, a straight line will be drawn from the vessel which indicates its position in the previous "turn"
Other
- A dark orange x indicates an alien wreck or ruin
- A red square surrounding a jump point indicates a jump gate that was built by someone else.
Notes
- The information contained in this page was based on Aurora version 5.10.
